
This tutorials shows you how to install Nagios Core (version 4.5.3), including the Nagios Plugins (version 2.4.10) and NConf (version 1.3.0-0) on Debian 12. Nagios Core and NConf use ancient versions of PHP and MySQL so we have to use external repositories and packages.
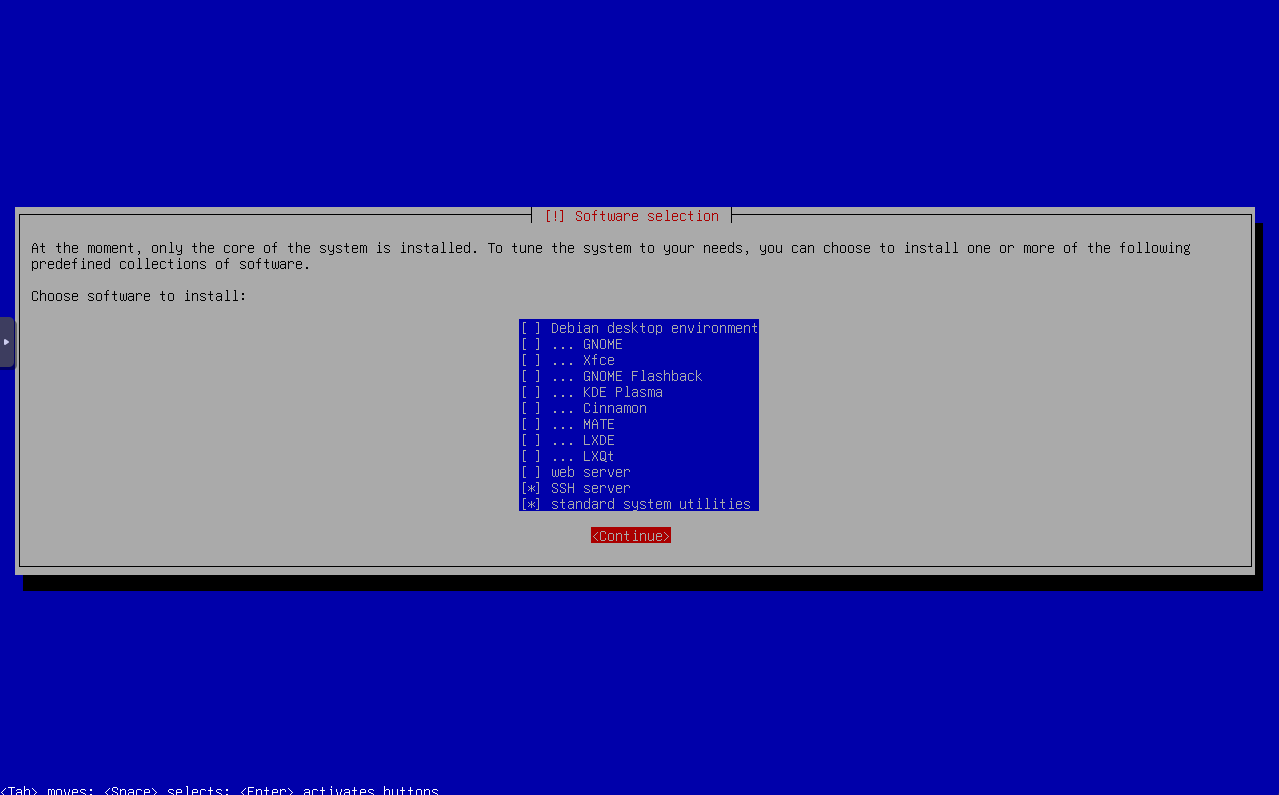
Start with installing Debian 12. You can download the version I used for this tutorial here. Install Debian without a desktop-environment but do install the SSH server and standard system utilities. This tutorial is written without entering a root password when installing Debian, thus having the main user having sudo-permissions.
When your server is installed and booted, use your favorite tool to connect using SSH and log in. Make sure your are logged in as super user:
# sudo suInstall GnuPG en Curl:
# apt update && apt install gnupg curl -yExecute following commands to add the PHP 5.6 repository and add it’s key:
# sh -c 'echo "deb https://packages.sury.org/php/ $(lsb_release -sc) main" > /etc/apt/sources.list.d/php.list'

# curl -s https://packages.sury.org/php/apt.gpg | sudo gpg --no-default-keyring --keyring gnupg-ring:/etc/apt/trusted.gpg.d/php.gpg --import

# chmod 644 /etc/apt/trusted.gpg.d/php.gpg
Install PHP 5.6 and other required packages:
# apt update && apt install php5.6 php5.6-gd wget build-essential unzip libssl-dev libgd-dev php5.6-mysql ufw libsuma1 libaio1 libmecab2 psmisc libclass-dbi-perl libdbd-mysql-perl sudo mailutils -y Download, install and configure Nagios Core 4.5.3:
# cd /tmp

# wget https://downloads.dennisbor.com/nagios-4.5.3.tar.gz

# tar -zxvf nagios-4.5.3.tar.gz

# cd nagios-4.5.3

# ./configure --with-httpd-conf=/etc/apache2/sites-enabled

# make install-groups-users

# make all

# make install

# make install-daemoninit

# make install-commandmode

# make install-config

# make install-webconf

# a2enmod rewrite cgi
Set a password for user nagiosadmin:
# htpasswd -c /usr/local/nagios/etc/htpasswd.users nagiosadminSet ownership and permissions for the nagios user file:
# chown www-data:www-data /usr/local/nagios/etc/htpasswd.users

# chmod 640 /usr/local/nagios/etc/htpasswd.users
Download, install and configure the Nagios plugins:
# cd /tmp

# wget https://downloads.dennisbor.com/nagios-plugins-2.4.10.tar.gz

# tar -zxvf nagios-plugins-2.4.10.tar.gz

# cd nagios-plugins-2.4.10

# ./configure --with-nagios-user=nagios --with-nagios-group=nagios

# make

# make install
Add the Nagios user to the www-data group:
usermod -aG www-data nagiosConfigure the firewall to allow connections on port 80 (web server) and 22 (SSH) and enable it:
# ufw allow 80

# ufw allow 22

# ufw enable
Restart Apache (the web server), start the Nagios-service en enable at boot:
# systemctl restart apache2
# systemctl start nagios.service
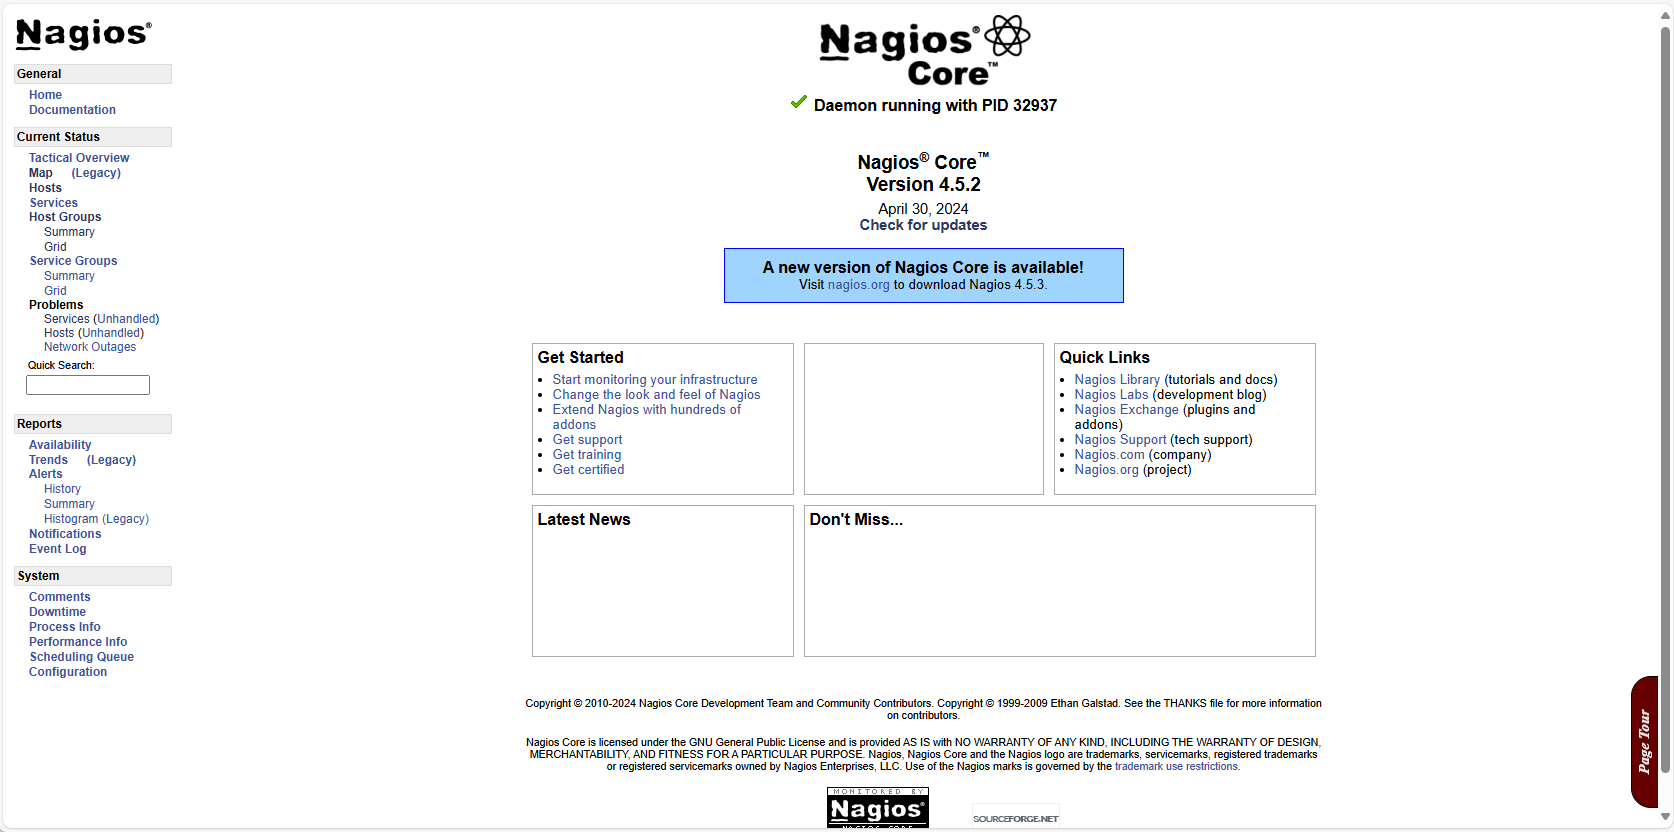
# systemctl enable nagios.serviceNow navigate to http://<IP_ADDRESS>/nagios/ and log in with the set credentials. You will see an active Nagios installation!
Download NConf, extract it and copy the contents to the subdirectory in Nagios:
# cd /tmp

# wget https://downloads.dennisbor.com/nconf-1.3.0-0.tgz

# tar -zxvf nconf-1.3.0-0.tgz

# cd nconf

# mkdir /usr/local/nagios/share/nconf

# cp -r * /usr/local/nagios/share/nconf
Set ownership and permissions:
# chown -R www-data:www-data /usr/local/nagios/share/nconf/

# chmod  775 /usr/local/nagios/share/nconf/bin/*
Download MySQL 5.7 and extract it:
# cd /tmp

# wget https://downloads.dennisbor.com/mysql-server_5.7.42-1debian10_amd64.deb-bundle.tar

# tar xf mysql-server_5.7.42-1debian10_amd64.deb-bundle.tar
Install MySQL and set a root password:
# dpkg -i mysql-common_5.7.42-1debian10_amd64.deb

# dpkg-preconfigure mysql-community-server_5.7.42-1debian10_amd64.deb
To prevent version-mismatches, we uninstall LibC6-Dev and fix remaining broken dependencies:
# apt remove libc6-dev -y

# apt --fix-broken install -y
Install the remaining MySQL packages:
# dpkg -i libmysqlclient20_5.7.42-1debian10_amd64.deb libmysqlclient-dev_5.7.42-1debian10_amd64.deb libmysqld-dev_5.7.42-1debian10_amd64.deb mysql-community-client_5.7.42-1debian10_amd64.deb mysql-client_5.7.42-1debian10_amd64.deb mysql-common_5.7.42-1debian10_amd64.deb mysql-community-server_5.7.42-1debian10_amd64.deb mysql-server_5.7.42-1debian10_amd64.debIf an error is displayed, regarding unmet or broken dependencies, fix it:
# apt --fix-broken install -yLog on to the MySQL-server with the previously set root-password:
# mysql -u root -pCreate database nconf, create a default user (I will give it the name nconfadmin), set a password and grant the required privileges to the database:
mysql> CREATE DATABASE nconf;

mysql> CREATE USER nconfadmin@localhost IDENTIFIED BY 'nconfpassword';

mysql> GRANT ALL PRIVILEGES ON nconf.* TO nconfadmin@localhost;

mysql> FLUSH PRIVILEGES;

mysql> EXIT
Restart the web server:
# systemctl restart apache2When browsing to http://<IP_ADDRESS>/nagios/nconf/INSTALL.php, you will see we meet all requirements for NConf 1.3.0:

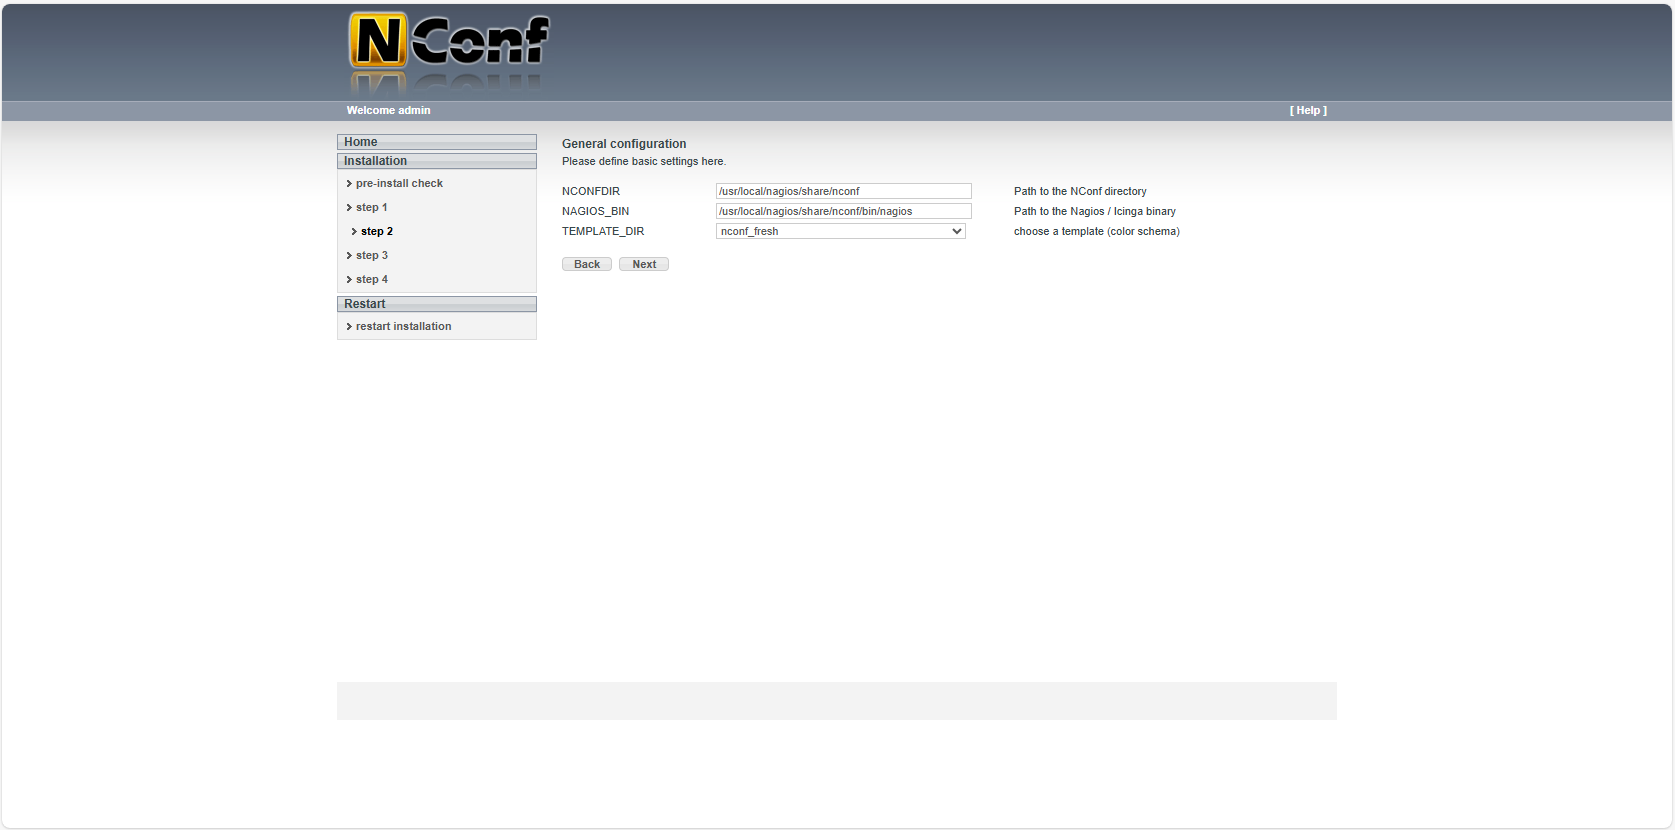
Click Next to start the configuration. Use ‘nconf’ for DBNAME, ‘nconfadmin’ for DBUSER and the previously set password for DBPASS. Click on Next. If the settings and credentials are entered correclty, a connection with the database is established and database tables are created.

Click Next and do not change anything in the next screen.
Klik op Next. Choose ‘TRUE’ for AUTH_ENABLED which requires users to log on to NConf. Choose an administrator-password for file_admin_password. This will protect the user-file.

Click Next. When everything is configured properly, you will see nine green OK’s:
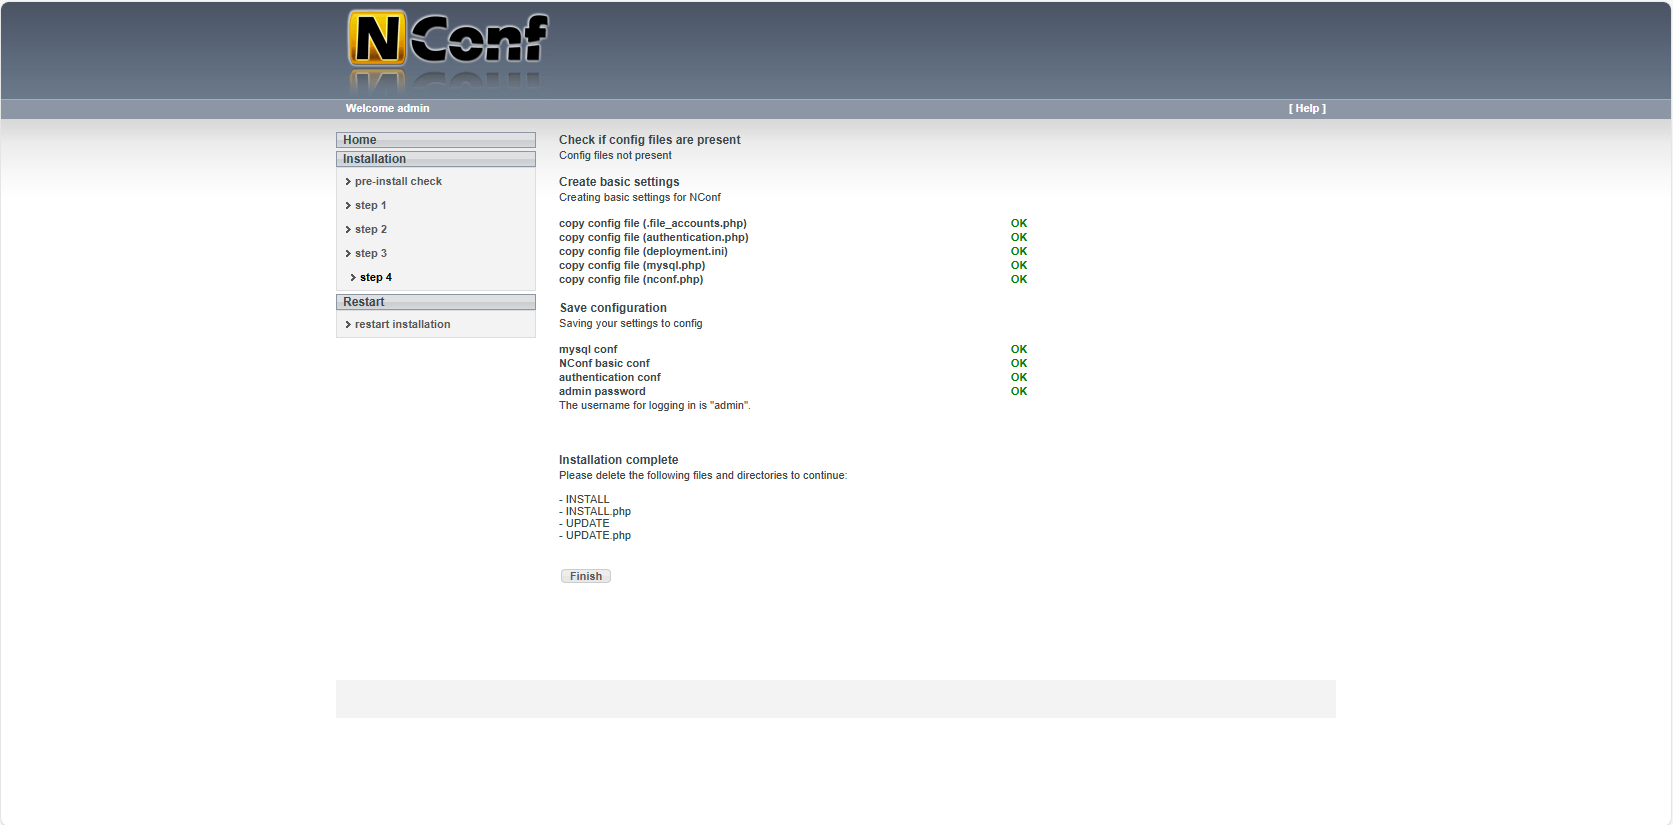
Head back to your server and remove the NConf installation and temporary files:
# rm -r /usr/local/nagios/share/nconf/INSTALL

# rm /usr/local/nagios/share/nconf/INSTALL.php

# rm -r /usr/local/nagios/share/nconf/UPDATE

# rm /usr/local/nagios/share/nconf/UPDATE.php

# rm -r /tmp/*
Click Finish, log in with username admin and the previously set password.

Now we have to alter a script, because of version incompatibilities:
# nano /usr/local/nagios/share/nconf/bin/lib/NConf/ExportNagios.pmNavigate to line 1274 and replace the following code:
foreach my $def_srv_deps_param (keys(%{$srv->[2]})){
   unless($def_srv_deps_param && %{$srv->[2]}->{$def_srv_deps_param}){next}
      $fattr = $def_srv_deps_param;
      $fval  = %{$srv->[2]}->{$def_srv_deps_param};
with (please note the differences, marked with bold characters in red):
foreach my $def_srv_deps_param (keys(%{$srv->[2]})){
   unless($def_srv_deps_param && ${$srv->[2]}->{$def_srv_deps_param}){next}
      $fattr = $def_srv_deps_param;
      $fval  = ${$srv->[2]}->{$def_srv_deps_param};
We have to change the NConf configuration file:
# nano /usr/local/nagios/share/nconf/config/nconf.phpChange the line with the Nagios-binary path to following:
define('NAGIOS_BIN', '/usr/local/nagios/bin/nagios');To use auto-deployment, we have to add the deployment configuration:
# nano /usr/local/nagios/share/nconf/config/deployment.iniAdd the following code to the file:
[local deploy extract]
type       = local
source_file = "/usr/local/nagios/share/nconf/output/NagiosConfig.tgz"
target_file = "/usr/local/nagios/"
action      = extract
reload_command = "sudo /usr/bin/systemctl restart nagios"
To be able to run the reload command, we have to add the nagios user to the sudo group:
# usermod -aG sudo nagiosTo prevent the system from asking a root password when executing the reload command, we add a line to the sudoers-file using following command:
# echo 'ALL ALL=NOPASSWD: /usr/bin/systemctl' >> /etc/sudoersWe have to create two subdirectories in which Nconf will extract configuration files:
# mkdir /usr/local/nagios/Default_collector

# mkdir /usr/local/nagios/global
Now we change the Nagios configuration file to stop using the original files and start using the two new folders:
# sed -i '/cfg_file=/s/^/#/g' /usr/local/nagios/etc/nagios.cfg

# echo 'cfg_dir=/usr/local/nagios/Default_collector' >> /usr/local/nagios/etc/nagios.cfg

# echo 'cfg_dir=/usr/local/nagios/global
' >> /usr/local/nagios/etc/nagios.cfg
To prevent permission issues, run the following commands (please note the removal and re-creation of the temp-folder, which for me was the only way to get access):
# rm -rf /tmp

# mkdir /tmp

# chmod 1777 /tmp

# chmod 1777 /usr/local/nagios

# chown -R www-data:www-data /usr/local/nagios
By default, the Nagios pages display errors instead of the host images, so we have to move them to the proper path:
# mkdir /usr/local/nagios/share/images/logos/base

# cd /usr/local/nagios/share/images/logos

# mv * base
Please note that the latter will give you a warning because it can’t move the subfolder into itself. You can ignore this.
Nagios and NConf are ready to use. All you have to do is to configure Postfix for sending e-mail notifications.
Need to monitor a Windows Server? Don’t forget to install the NSClient++ to enable monitoring. You can download it here.
Did this tutorial help you and save you some precious time? Consider donating. Every donation will be invested in my IT career.
Localization
By default, Nagios uses US localization. You can however change this setting to one of the following:
| Format | Date/time is display as |
| us | MM-DD-YYYY HH:MM:SS |
| euro | DD-MM-YYYY HH:MM:SS |
| iso8601 | YYYY-MM-DD HH:MM:SS |
| strict-iso8601 | YYYY-MM-DDTHH:MM:SS |
To change the localization, modify the Nagios configuration file:
# nano /usr/local/nagios/etc/nagios.cfgSearch for the line containing date_format and change it to your preferred value (European in the following example).
date_format=euroSave the file and reload Nagios for the changes to take effect.
Updating Nagios from 4.5.2 to 4.5.3
If you are still using Nagios Code 4.5.2 and would like to update to 4.5.3, use the steps below.
First backup your old Nagios installation, just in case!
# tar -cvf /tmp/nagios_backup.tar /usr/local/nagiosStop both Nagios and Apache
# systemctl stop nagios apache2Download Nagios Code 4.5.3:
# cd /tmp

# wget https://downloads.dennisbor.com/nagios-4.5.3.tar.gz
Unpack the archive and enter the folder:
# tar -zxvf nagios-4.5.3.tar.gz

# cd nagios-4.5.3
We need LibC6 development tools for compiling:
# apt install libc6-dev -yConfigure, compile and install Nagios:
# ./configure --with-httpd-conf=/etc/apache2/sites-enabled

# make all

# make install
Start both Nagios and Apache
# systemctl start nagios apache2Finished!
Common issues
Please see the text below to solve the most common problems configuring / deploying. Stuck on another error? Do not hesitate to contact me!
Error: Service has no hosts and/or service_description (config file ‘/usr/local/nagios/share/nconf/temp/Default_collector/advanced_services.cfg’, starting on line 120)
This error is displayed when you delete hosts and there are advanced services without linked hosts left. Make sure all advanced services are linked to at least one host or otherwise delete them.
New hosts are not displayed in Nagios
This has to do with the folder permissions. Execute following command:
chmod -R 777 /usr/local/nagios